Showing posts with label Adding Character. Show all posts

Friday, February 28, 2014

Project Add Character, Part II: The Living Room

Last November I talked about adding architectural detail to the living room, calling it "Project Add Character", and in January I talked about how confident I felt that it would be my best DIY project to date. Well, folks, the living room is now done, and I couldn't be happier with the results. This really could be my favourite project so far - it looks amazing!!


Last month I revealed the dining room wall which received the same treatment. That wall was my starter project, where I added one large section of trim moulding just to get a feel for the method and level of difficulty. If you're looking for the step by step DIY tutorial, click on the "Adding Character With Wall Moulding" link in the right sidebar of Cherish Toronto. The living room wall is a serious transformation. What do you think?

Here is the "Before" shot:
 

And here is the "After":


Since I had to work around the air vents & sprinkler I chose to place the mouldings 12" from the ceiling and left the same amount of space at the bottom for balance. I used the same placement on the dining room wall so that both spaces are at a consistent level. I want to add crown moulding eventually, but I've heard that installation can be tricky so I may just leave that to the professionals. Currently up for debate is whether or not to return the paintings to this wall, and exactly where to place them. I can't decide if I like the idea of both of them stacked vertically within the frame to the left of the television. I'm looking for second opinions on this one.

Of course there are a few things I dislike, but which I cannot change - one being the white sprinkler head poking out at the top of the wall (never paint the sprinklers), and the other being the ugly white thermostat on the right. I tried switching it out for a NEST thermostat, but my HVAC wiring wasn't compatible with that system. Boo :( Maybe this Honeywell will work.
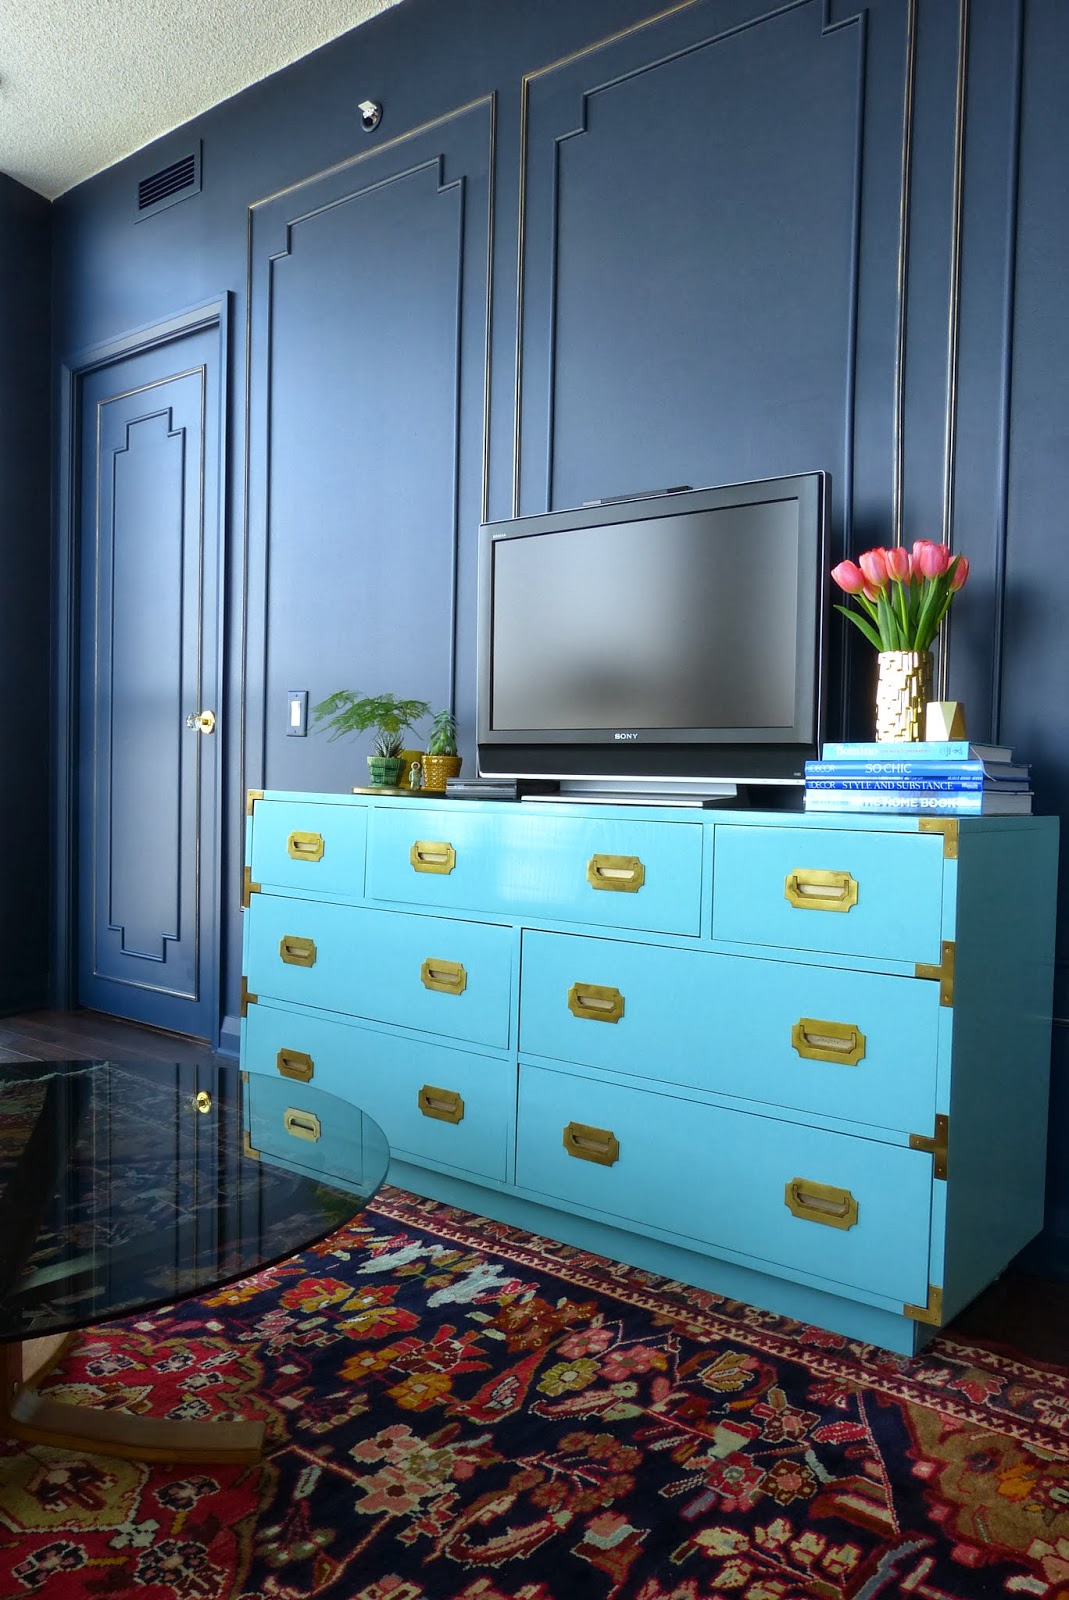


You may have noticed that I switched out the lever door handle leading into the master bedroom for a beautiful diamond crystal knob from Emtek hardware. Shout out to my buddy Frank for getting me wholesale pricing ;) It's all in the details, like the way the brass finish of the rosette picks up on the gold leaf detail on the moulding.


The hardest part of this whole project was painting the wall and trim - first coat on Saturday, second coat on Sunday (thank goodness it only needed 2 coats). I must have been up and down the ladder 237 times getting into every nook and cranny from the door trim to the vent cover to the baseboards. I love the look of painting everything out in one colour - it adds even more height to the 9 foot ceilings and reminds me of Parisian apartments.


Since this is an open concept space, I'm happy with the way the living room & dining room relate to each other with the same treatment on both walls. Now I'm struggling with how to create flow through to the kitchen and study nook beyond. It's always something, isn't it?


*Thank you to Para Paints for supplying the paint for this project. The wall colour is Marine Bay, P5156-75, in an eggshell finish.
**Thank you to Home Depot Canada for supplying the Ryobi cordless brad nailer for this project. I'm pretty sure it would have take a lot longer without this fabulous tool.

Wednesday, January 8, 2014

2014: The Year of Confidence

2014. Hmmm... I've been considering how I want this year to go, and all I know is that I want it to be awesome. To tell the truth, 2013 sucked, and since I can't get a do-over, I'm counting on a much improved year in 2014. Life is what you make it, right? So basically it's up to me to make it better, and to have the confidence to make it so.

Looking back on 2013, I did get a few things accomplished in the new condo through the year...

Above clockwise from top left corner: Guest Bedroom, Guest Bath, Balcony,
Master Bedroom, Lumbar Pillows, Dining Room, Study Nook, Master Bath.

Setting my sights on 2014, I'm kicking it off by finally getting started on what I'm calling "Project Add Character". Look for the hashtag combination of #addcharacter & #trim on Twitter to follow my progress. I'm working with Home Depot Canada and Para Paints on this trim project and I'm confident that this will my best DIY yet!


This trim project will be the last significant DIY for awhile, but there are a few other things to finish in the condo this year:

  • Switch out four remaining ugly lever door handles for crystal knobs like this one. Done January!
  • Find (hopefully on Kijiji) a round glass top dining table to improve flow. Done January!
  • Purchase 2 comfortable counter height stools for the kitchen island. Done January!
  • Figure out where and how to use these chinoiserie panels. Still thinking about it!
  • Change bathroom light fixtures to something less boring and more stylish like these. Done September!
  • Add a small piece of furniture to the master bedroom for extra storage. 2015 for sure!
Once I've crossed all of the items off the list above, it will be time to start saving for a getaway. I haven't really been on vacation (work trips don't count) since I visited Paris in October 2012. Both Heather of Habitually Chic and Tim of Design Maze have recently taken European vacations and their photos have given me the itch to travel. I am confident that I'll be taking a fabulous trip this fall.

"Cheers" to 2014!!
(Anthropologie garland, photo via Pinterest)


Thursday, November 7, 2013

Adding Character to a New Condo

There is another project brewing at home. I've decided that the new condo needs some character, and it's going to get that with some DIY architectural trim and mouldings. Despite being where I spend most of my waking hours while at home, I haven't done anything in the living room. I rolled out the rug, positioned the furniture, plugged in the tv, cable and Wii, and sat down. Done. But as a design blogger, I know this room could be and should be so much better! Here's what I'm working with (excuse the crappy photo - I couldn't get the whole wall in one frame, so it's actually 2 images photoshopped together):


"Bo" to the "ring", right? When I look at this, I'm actually kinda embarrassed by the lack of effort I've made here. Those 9 foot ceilings need to be highlighted, and I'm hoping that the addition of dentil crown moulding at the ceiling and picture frame moulding on the walls will make the height a true feature. A coat of navy blue paint on both wall and trims should make the room sing. Right now it's just so bottom heavy and blah :(

I'm currently in the planning stages, and I'm already finding it tricky to plan the layout. How am I going to work around all of the obstacles on this wall? The door to the master bedroom is on the left, the forced air unit is on the right with the thermostat above, two air vents are set along the top of the wall and a random sprinkler sits in the middle of it all. Ugh. Not to mention that the sprinkler and the thermostat are 100% un-paintable, which means two white blobs on an otherwise navy blue wall.

If you can mentally combine the three images below into one, it will give you a good idea of what I'm trying to create. Navy blue walls, double mouldings, maybe with a dash of gold highlight:

 Above images via Living Etc, House & Home, Lonny Mag.

I found this shallow dentil moulding at Home Depot and I think it would look great along the top of the wall throughout the entire space. Although this moulding is technically intended to be used as a chair rail, it works perfectly here because it will fit in the small three inch gap between the top of the vents and the ceiling:


And here's a quick sketch I put together to illustrate the possible layout of mouldings on the wall and door. I've snuck in a few little upgrades like a new crystal knob on the door to the master bedroom and maybe a NEST thermostat:

  
Anyone have advice about the layout? About the materials? About the installation? I'm all ears!!